Weaviate
This page contains the information to store processed data to Weaviate.
Prerequisites
Weaviate Local Install or Cloud Service
Weaviate URL and Class Name
Authentication Credentials (if required)
For more information, please refer to Weaviate documentation.
Warning
Ensure that the index schema is compatible with the data you intend to write. If you need guidance on structuring your schema, consult the Sample Index Schema for reference.
Step-by-Step Guide
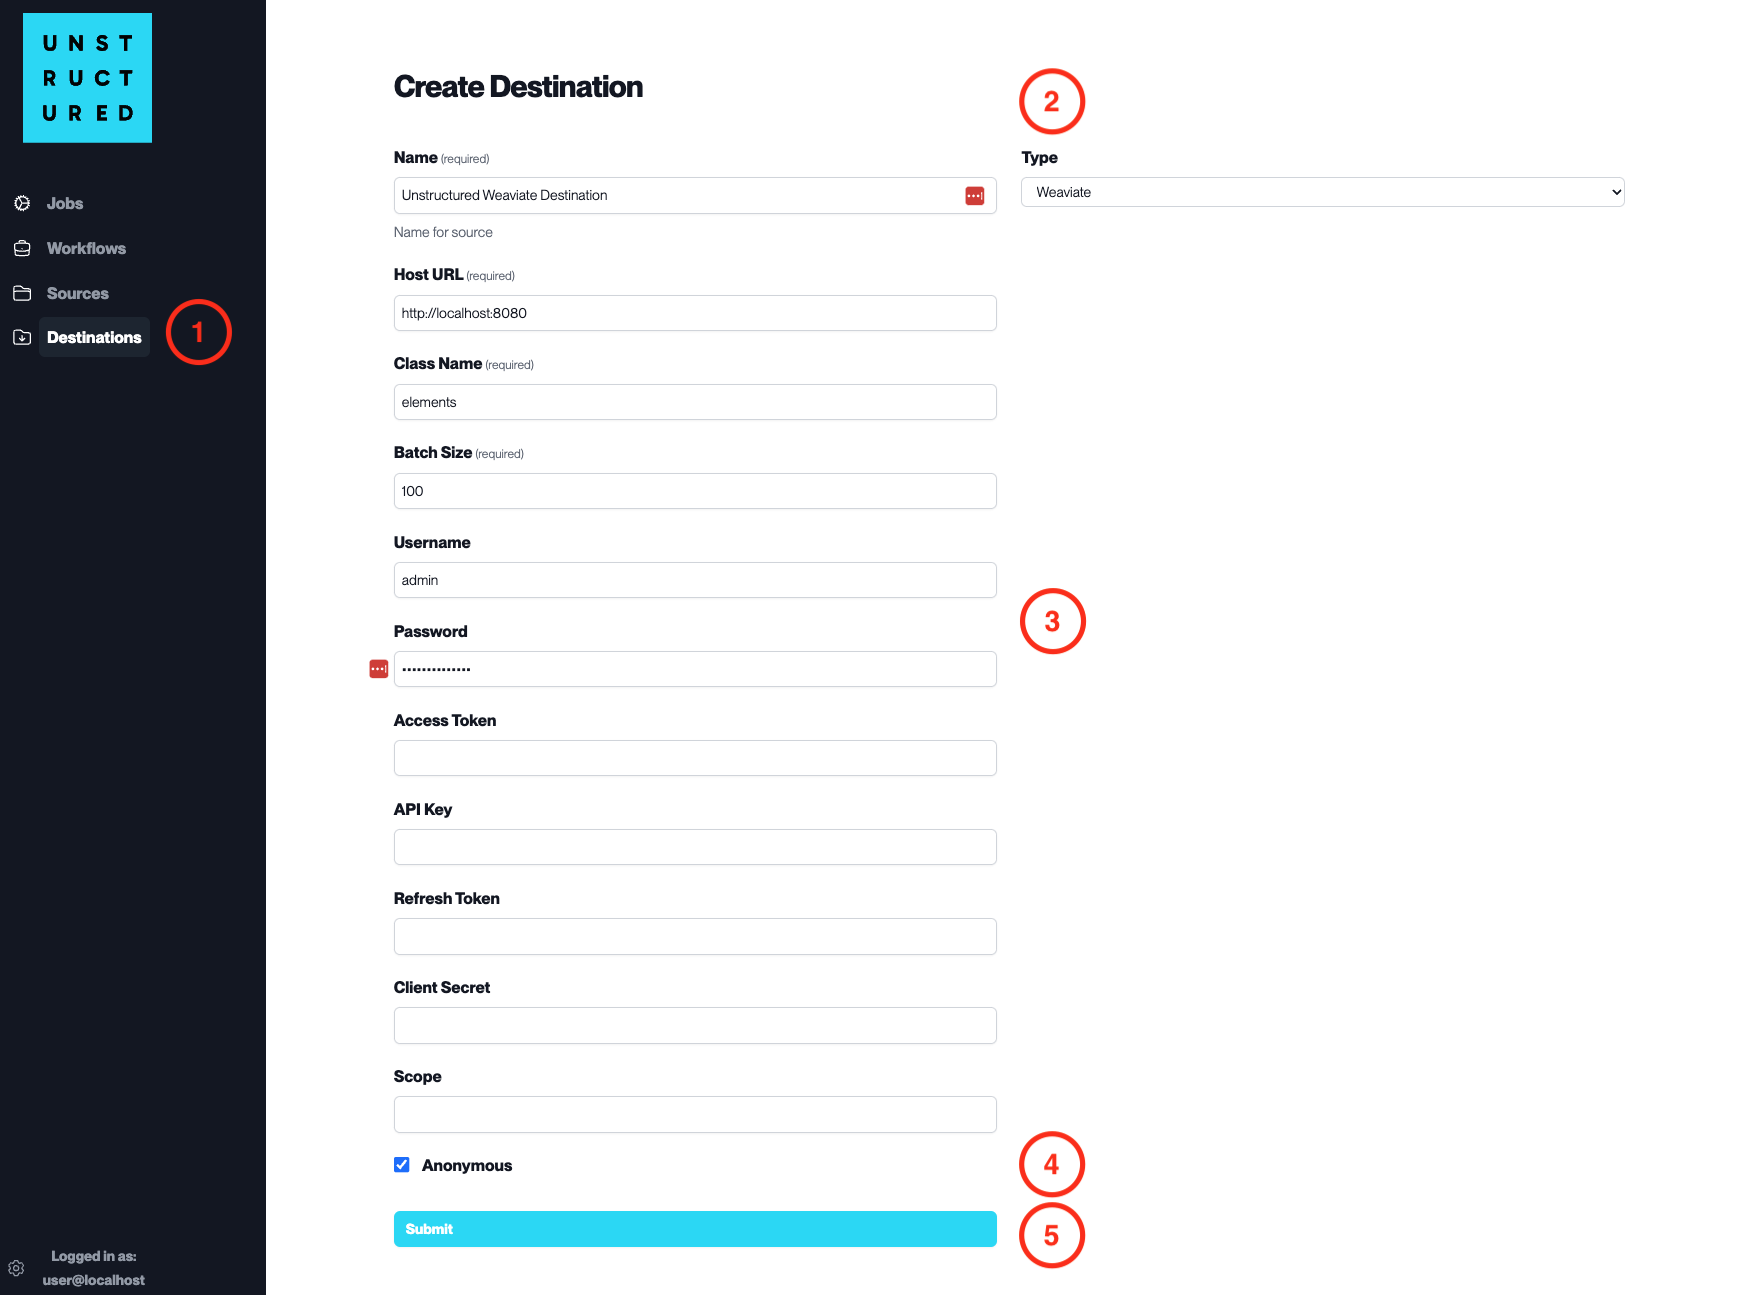
Access the Create Destination Page. Navigate to the “Destinations” section within the platform’s side navigation menu and click on “New Destination” to initiate the setup of a new destination for your processed data.
Select Destination Type. Select Weaviate destination connector from the
Typedropdown menu.Configure Destination Details
Name(required): Assign a descriptive name to the new destination connector.
Host URL(required): Enter the URL of the Weaviate instance.
Class Name(required): Specify the class name within Weaviate where data will be stored.
Batch Size(required): Define the number of records the platform will send in a single batch.
Username: Provide the username if authentication is required.
Password: Enter the password corresponding to the username.
Access Token,API Key,Refresh Token,Client Secret: Provide these details if needed for the Weaviate authentication process.
Scope: Specify the scope if applicable for OAuth.
Additional Settings
Check
Anonymousif you are connecting without authentication.
Submit. Review all the details entered to ensure accuracy. Click ‘Submit’ to finalize the creation of the Destination Connector. The newly completed Weaviate connector will be listed on the Destinations dashboard.