Databricks
This page contains the information to store processed data to Databricks.
Prerequisites
Host URL for Databricks workspace
Account ID for Databricks
Username and Password for Databricks authentication (if applicable)
Personal Access Token for Databricks
Cluster ID
Catalog, Schema, and Volume within Databricks
For more information, please refer to Databricks documentation.
Step-by-Step Guide
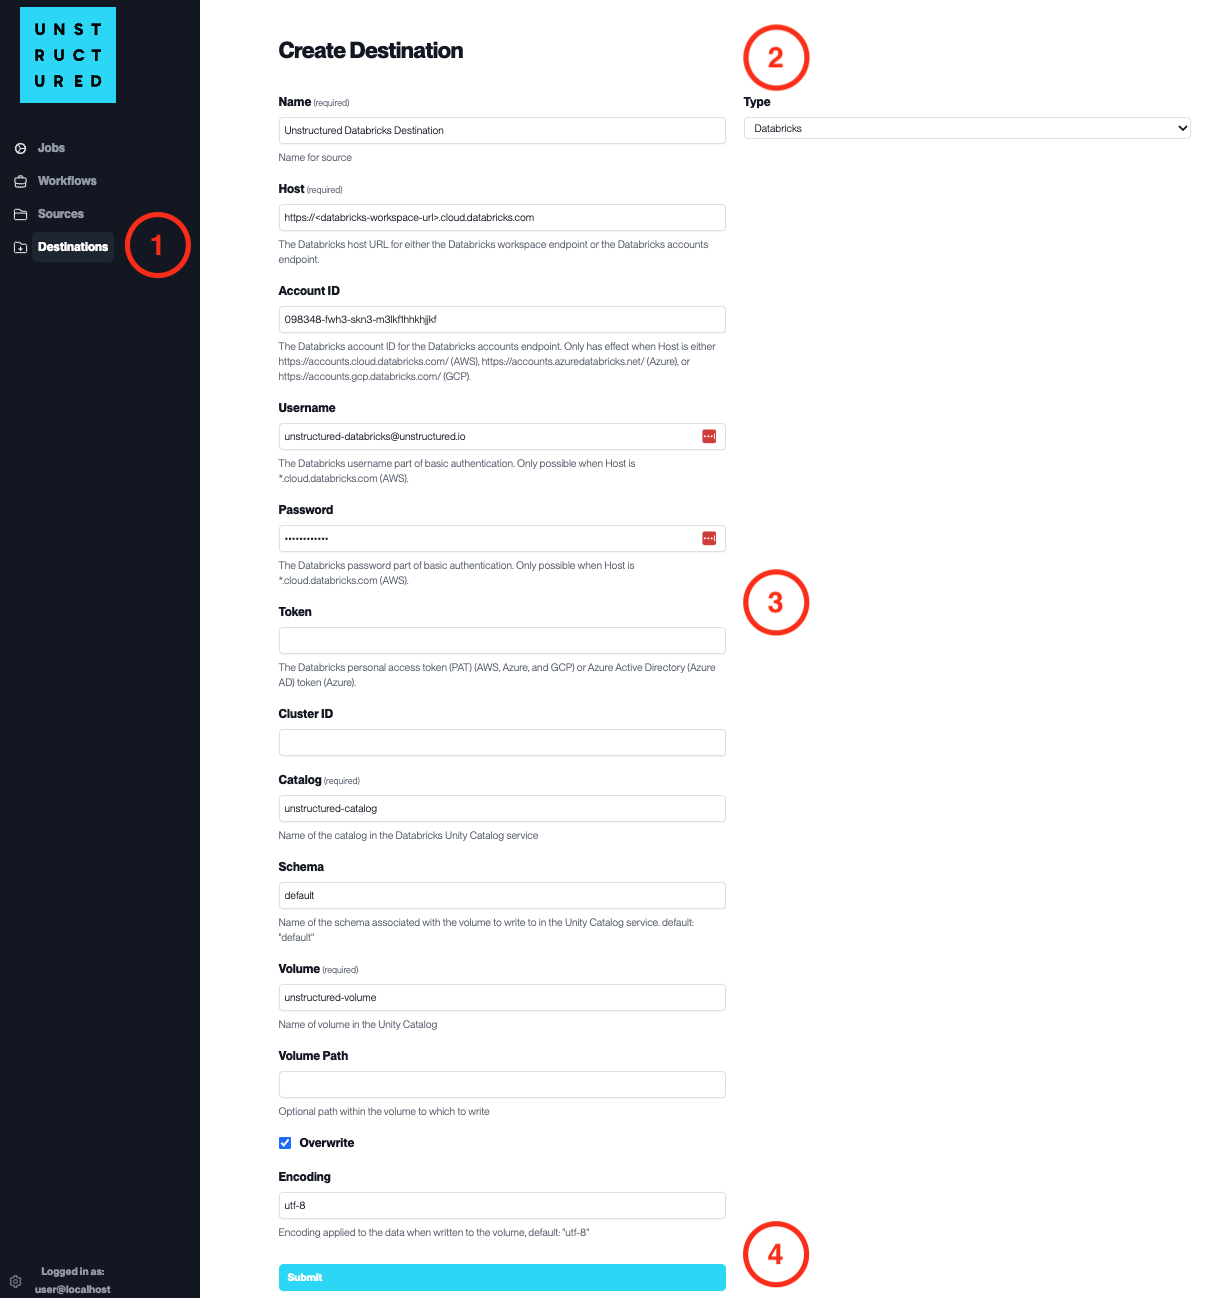
Access the Create Destination Page. Navigate to the “Destinations” section within the platform’s side navigation menu and click on “New Destination” to initiate the setup of a new destination for your processed data.
Select Destination Type. Select Databricks destination connector from the
Typedropdown menu.Configure Destination Details
Name(required): Assign a descriptive name to the new destination connector.
Host(required): Enter the Databricks workspace host URL.
Account ID: Specify the Databricks account ID.
Username: Provide the Databricks username.
Password: Enter the Databricks password.
Token: Input the Databricks personal access token.
Cluster ID: Indicate the Databricks cluster ID.
Catalog(required): Name of the catalog in the Databricks Unity Catalog service.
Schema: Specify the schema associated with the volume.
Volume(required): Name of the volume in the Unity Catalog.
Volume Path: Provide an optional path within the volume to which to write.Check
Overwriteif existing data should be overwritten.
Encoding: Select the encoding applied to the data when written to the volume.
Submit. Review all the details entered to ensure accuracy. Click ‘Submit’ to finalize the creation of the Destination Connector. The newly completed Databricks connector will be listed on the Destinations dashboard.