Pinecone
This page contains the information to store processed data to Pinecone vector database.
Prerequisites
Pinecone Account and API Key
Pinecone Index
For more information, please refer to Pinecone documentation.
Step-by-Step Guide
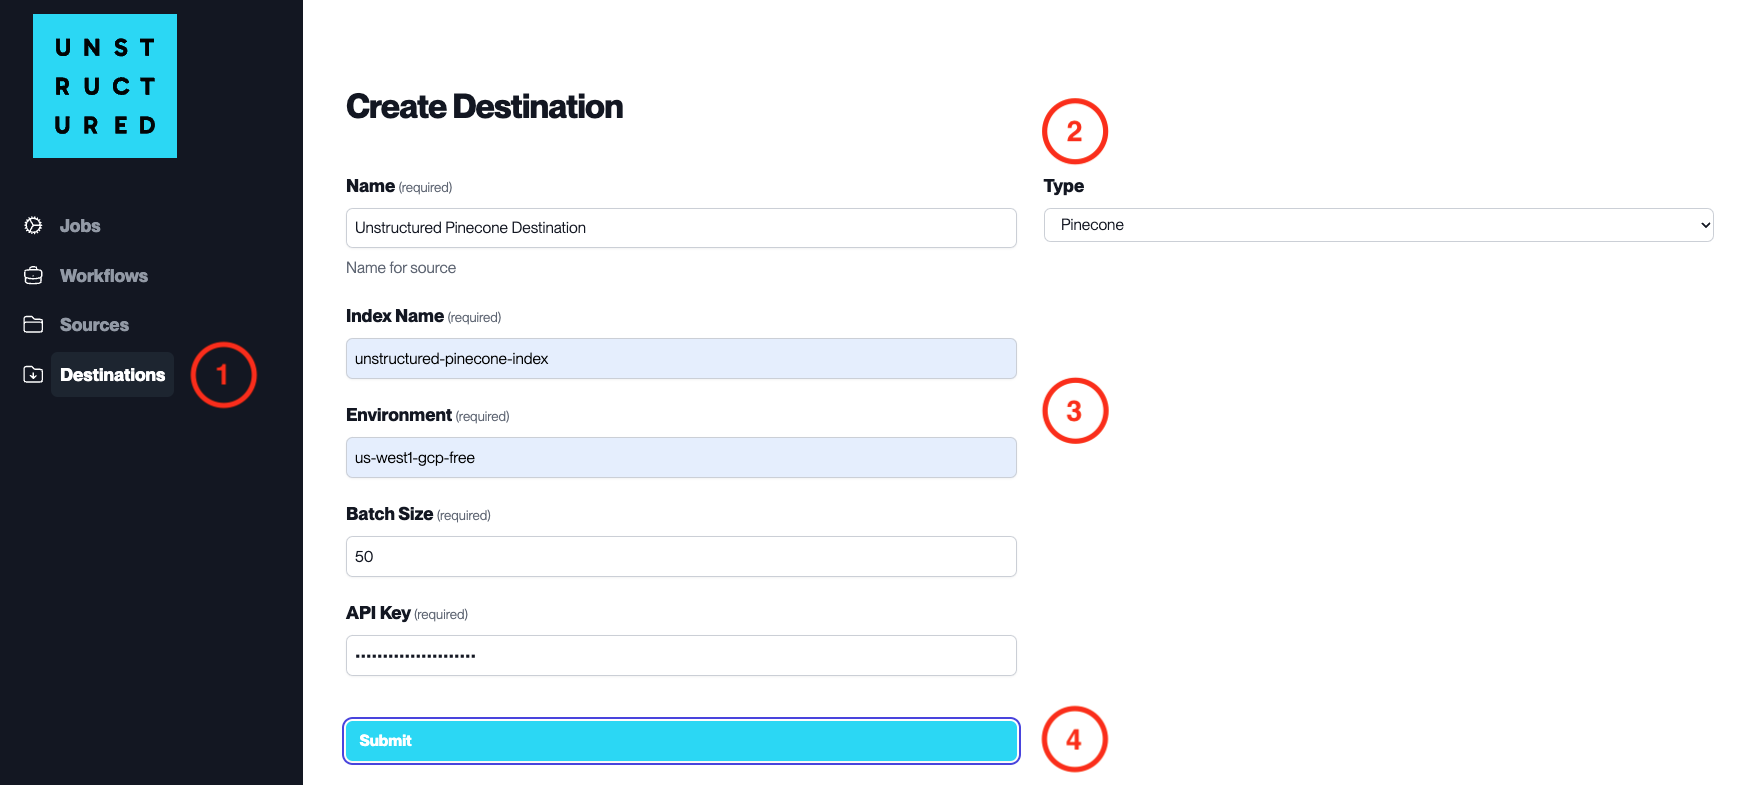
Access the Create Destination Page. Navigate to the “Destinations” section within the platform’s side navigation menu and click on “New Destination” to initiate the setup of a new destination for your processed data.
Select Destination Type. Select Pinecone destination connector from the
Typedropdown menu.Configure Destination Details
Name(required): Assign a descriptive name to the new destination connector.
Index Name(required): Enter the name of the index in the Pinecone database where the data will be stored.
Environment(required): Enter the Pinecone environment in which the index instance is hosted.
Batch Size(required): Define the number of records the platform will send in a single batch to the destination.
API Key(required): Input the API key provided by Pinecone for secure access.
Submit. Review all the details entered to ensure accuracy. Click ‘Submit’ to finalize the creation of the Destination Connector. The newly completed connector will be listed on the Destinations dashboard.