Chroma
This page contains the information to store processed data to a Chroma instance.
Prerequisites
ChromaDB Installation
For more information, please refer to Chroma documentation.
Step-by-Step Guide
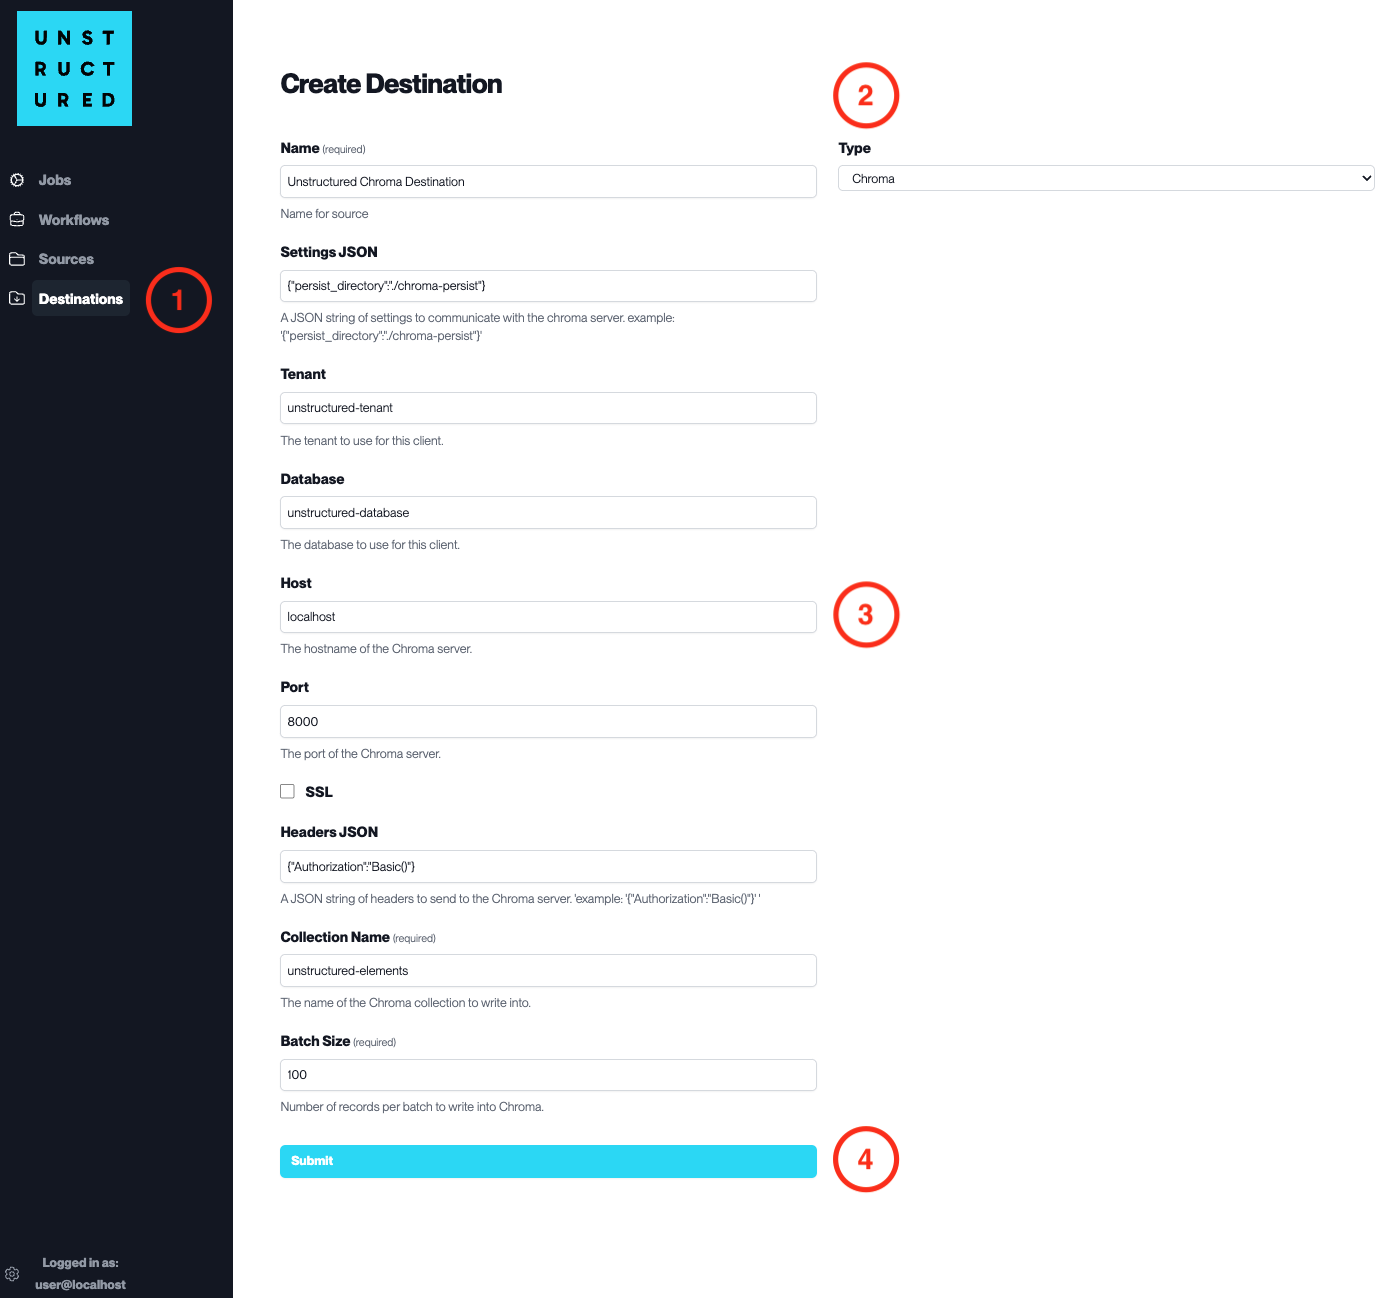
Access the Create Destination Page. Navigate to the “Destinations” section within the platform’s side navigation menu and click on “New Destination” to initiate the setup of a new destination for your processed data.
Select Destination Type. Select Chroma destination connector from the
Typedropdown menu.Configure Destination Details
Name(required): Assign a descriptive name to the new destination connector.
Settings JSON: Input the JSON string of settings to communicate with the Chroma server.
Tenant: Specify the tenant to use for this client.
Database: Enter the name of the database to use for this client.
Host: Provide the hostname of the Chroma server.
Port: Indicate the port of the Chroma server.Check
SSLif an SSL connection is required.
Headers JSON: Enter a JSON string of headers to send to the Chroma server.
Collection Name(required): Specify the name of the collection to write into.
Batch Size(required): Define the number of records per batch to write into Chroma.
Submit. Review all the details entered to ensure accuracy. Click ‘Submit’ to finalize the creation of the Destination Connector. The newly completed Chroma connector will be listed on the Destinations dashboard.